This is the first question you need to answer—and it depends on what you want to make, how much space you have, how much you want to spend, and how comfortable you are with chemicals and equipment.

Printmaking Purchase Guide
You've just spent three hours carefully carving your first linoleum block. The design looks perfect. You ink it up, lay down your paper, apply pressure, peel back the print and... everything is backwards. The text is reversed. The composition that worked beautifully on the block is now a mirror image on paper. Welcome to printmaking, where the most fundamental rule—your image prints in reverse—catches almost every beginner off guard.
Here's what nobody tells you upfront: 'printmaking' isn't one thing. It's at least four completely different disciplines that share almost nothing in common except the word 'print.' Relief printing (carving blocks), intaglio (etching metal plates), lithography (drawing on stone), and screen printing (pushing ink through mesh) each require different tools, different skills, different spaces, and different mindsets. Saying you want to learn printmaking is like saying you want to learn 'sports'—which one?
Printmaking Reality Check: This is the only visual art form where you can make multiples—real, original multiples, not reproductions. That's powerful. But it also means every mistake gets multiplied. There's no Ctrl+Z, no painting over errors. If you carve away too much linoleum, it's gone forever. If your etching bites too deep, you can't un-etch it. Printmaking rewards patience and punishes rushing more than almost any other medium.
Complete Guide Navigation
Which Printmaking Technique Is Right for You?
The Four Main Techniques (Honest Assessment)
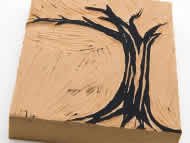
Relief Printing (Linocut, Woodcut) — Start Here
You carve away everything you DON'T want to print, leaving raised surfaces that receive ink. This is the most accessible technique: minimal space, no press required, no chemicals, relatively low cost.
- Cutting Tools: Pfeil Swiss Made tools (expensive but last forever), Flexcut palm tools (good mid-range), Speedball sets (cheap but dull quickly)
- Blocks: Speedball grey linoleum (consistent, forgiving), Battleship grey linoleum (firmer, holds detail), soft rubber like Speedy-Carve (easiest to cut but less crisp), wood blocks (traditional, but harder to carve)
- Inks: Caligo Safe Wash (oil-based but cleans with soap—best of both worlds), Speedball water-based (easy cleanup, dries fast), Gamblin Relief Ink (professional quality, traditional oil-based)
- The honest truth: You can make real prints with a $75 investment and a kitchen table. This is where beginners should start.
Intaglio (Etching, Drypoint, Engraving) — The Chemistry Challenge
The opposite of relief: ink goes INTO recessed lines, then the surface is wiped clean. Requires metal plates, chemicals, and a press (or serious arm strength). Beautiful, rich lines—but significant setup.
- Plates: Zinc (cheaper, good for beginners), copper (traditional, finer lines, more expensive), aluminum (lightweight, different characteristics)
- Mordants: Edinburgh Etch (ferric chloride + citric acid—the modern standard, much safer than nitric acid), ferric chloride alone, or copper sulfate solutions for zinc
- Tools: Etching needles, burnishers, scrapers, grounds and resists
- The honest truth: You need a dedicated workspace with a sink, ventilation, and chemical storage. Home etching is possible but requires real commitment to safety protocols. Most people learn etching in a shared printmaking studio before setting up at home.
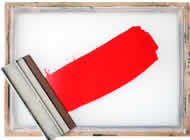
Screen Printing (Serigraphy) — Needs Space
Ink is pushed through a mesh stencil. Great for bold graphics, multiple colors, fabric printing. Commercial applications everywhere (t-shirts, posters).
- Screens: Newman Roller frames (professional), Speedball frames (hobby), various mesh counts for different applications
- Squeegees: Hardness matters—softer for fabric, harder for paper
- Inks: Water-based (easier cleanup, better for fabric), plastisol (requires heat curing), discharge inks (bleach the fabric then dye)
- The honest truth: Screen printing needs more space than you think—room for screens, a washout area, a drying rack, and an exposure unit. Great results are possible at home, but it's messy and space-intensive.
Lithography — The Expert's Technique
Based on the principle that oil and water don't mix. You draw with greasy materials on stone or treated aluminum plates. Capable of incredible subtlety and tonal range.
- Matrices: Traditional limestone (heavy, expensive, beautiful results), ball-grained aluminum plates (more practical, still demanding)
- Drawing materials: Litho crayons, tusche (liquid drawing ink), various greasy pencils
- The honest truth: Lithography is notoriously difficult. Even professional artists typically work with master printers who handle the technical processing. The chemistry is demanding, the equipment is specialized, and the learning curve is steep. Most people learn lithography in university programs or professional workshops, not at home.
What It Actually Costs (Be Realistic)
Printmaking costs vary wildly by technique. Here's an honest breakdown:
Investment by Skill Level
What you'll actually spend to get started and progress
| Level | Best Starting Technique | Reliable Brands | Realistic Budget |
|---|---|---|---|
| Beginner | Linocut (minimal equipment, immediate results) | Speedball, Essdee, Flexcut | $50-150 |
| Intermediate | Etching, multi-color screen printing | Charbonnel, Graphic Chemical, Pfeil | $200-600 |
| Advanced | Complex intaglio, reduction prints, lithography | Takach, Rembrandt, Conrad Machine | $1,000-5,000 |
| Professional | All techniques, edition printing, studio setup | Custom presses, Handschy, Polymetaal | $5,000-25,000+ |
Space Requirements (The Dealbreaker for Some)
Different techniques need very different spaces. Be honest about what you have before investing.
Relief Printing (Linocut/Woodcut):
Minimal requirements. A sturdy table, good lighting, and a place to dry prints. Can work in an apartment, spare room, or even a large closet. No special ventilation needed for water-based inks.
Screen Printing:
Space-intensive. You need room for screens (they're bigger than you think), a washout area with running water, space for drying racks, and somewhere to expose screens. Many home screen printers convert garages or basements. Ventilation matters if using solvent-based inks.
Etching:
Dedicated workspace required. You need a sink, chemical-resistant surfaces, proper ventilation (especially important for traditional acids), and locked storage for chemicals if children or pets are around. Edinburgh Etch is much more home-studio-friendly than traditional methods, but you still need a real workspace.
Lithography:
Professional space only. Lithography stones weigh 50+ pounds, specialized presses are large and expensive, and the chemistry requires proper facilities. This is a studio or university technique for most artists.
⚠️ Important:
The Hazards Are Real: Different printmaking techniques have different dangers. Relief printing: sharp tools (always carve AWAY from your body, use a bench hook). Etching: acids and mordants—even 'safer' ferric chloride is corrosive and will damage eyes and skin. Screen printing: solvent fumes from cleanup and some inks. Lithography: acidic etches and solvent-based materials. Know what you're working with, read the safety data sheets, and don't skip the gloves, goggles, and ventilation because it seems like overkill.
Frequently Asked Questions
What's the difference between water-based and oil-based printing inks?
Water-based inks (Speedball, Akua) clean up with soap and water, dry faster, and are safer for home studios. Oil-based inks (Charbonnel, Gamblin) give you more working time, richer colors, and that traditional printmaker feel—but require solvents for cleanup. The game-changer is Caligo Safe Wash: oil-based working properties that clean up with dish soap. For beginners, start water-based; upgrade to Caligo when you're hooked.
Which printmaking technique is best for beginners?
Linocut, without question. Minimal equipment ($50-75 gets you started), no chemicals, no press required, immediate results. You can be making real prints within an hour of opening your supplies. Screen printing is also accessible but needs more space. Save etching and lithography until you've got the basics down—they require significant investment in equipment, chemistry knowledge, and often access to a proper studio.
Do I need a press for printmaking?
For relief printing (linocut, woodcut): no. A wooden spoon or baren works fine. For intaglio (etching): practically yes. You CAN hand-burnish small plates, but it's exhausting. For screen printing: a press helps with registration but isn't strictly necessary. For lithography: yes, a specialized press is required. The honest answer: start without a press and see if you stick with it before investing.
My print came out backwards—what happened?
Welcome to printmaking! The image on your block/plate/screen is ALWAYS reversed from what prints on paper. This catches every beginner. When designing, either draw in reverse from the start, or create your design normally and flip it before transferring to your block. Text is the most obvious issue—if you forget to reverse your letters, they'll print backward.
Why do my prints look blotchy or uneven?
Usually one of three things: too much ink (fills in carved areas and makes everything muddy), not enough ink (faint, inconsistent coverage), or uneven pressure (use a press or improve your burnishing technique). Roll a thin, even 'tacky' layer of ink—it should make a light hissing sound as you roll. When in doubt, less ink is usually better than more.
What's Edinburgh Etch and why does everyone recommend it?
Edinburgh Etch is ferric chloride mixed with citric acid—developed in 1997 as a safer alternative to traditional nitric acid for etching copper. It doesn't produce toxic fumes, etches more controllably, and lasts a long time. It's still corrosive (wear gloves and goggles), but it's made home etching studios actually practical. If you're getting into etching, this is the mordant to use.
How do I choose the right mesh count for screen printing?
Lower numbers = more ink, bolder prints, less detail. Higher numbers = less ink, finer detail, softer hand feel. Start with 156 mesh—it handles most designs well. Use 110 for bold graphics on dark shirts or for underbases. Move to 200+ for photographic halftones and fine detail. When in doubt, 156 is the safest all-purpose choice.
💡 Pro Tip:
The Sharp Tools Rule: Dull carving tools don't just make worse cuts—they cause injuries. When tools are dull, you push harder, and when you push harder, you slip. A sharp V-gouge glides through linoleum; a dull one requires force and skips unpredictably. Invest in good tools and learn to sharpen them, or budget for replacing cheap tools regularly. Your fingers will thank you.
Tools and Materials by Category
Once you've chosen your technique, here's what you actually need—and what you can skip.
Brayers and Rollers (More Important Than You Think)
Brayers roll ink onto your printing surface, and a bad brayer makes everything harder. The goal is a thin, even ink layer—too thick and ink fills your carved lines; too thin and your print looks weak.
What Actually Matters:
- Soft rubber brayers (durometer 20-40): Most versatile, good for beginners, conform to slight surface variations. Start here with a 4-inch Speedball.
- Hard rubber brayers (durometer 60+): Deposit thinner, more precise ink layers. Better for detailed work but less forgiving.
- Width matters: Get a brayer slightly wider than your typical block size. A 4-inch is standard; 6-inch for larger work.
- Handle comfort: You'll roll hundreds of times per session. Ergonomic handles (like Takach) reduce fatigue.
Beginner advice: One good 4-inch soft rubber brayer (Speedball, about $12-15) handles 90% of relief printing work. Add a hard rubber brayer later when you're doing fine detail work.
Relief Printing Materials (Blocks and Carving Tools)
Relief printing is where most people start, and for good reason: the barrier to entry is low, the results are immediate, and you can work at a kitchen table.
Choosing Your Block Material:
Traditional grey linoleum: The standard. Battleship grey and Speedball grey lino offer consistent carving with good detail. Warm it slightly (on a heating pad or in sunlight) if it feels stiff. This is what most people use.
Soft 'rubber' blocks (Speedy-Carve, Soft-Kut): Much easier to carve—almost too easy. Great for beginners learning tool control, but details can be mushy and blocks wear out faster. Good for experimentation, less good for serious editions.
Traditional wood: Plank wood (carving with the grain) gives bold, organic marks. End-grain wood (like boxwood) allows incredibly fine detail but requires specialized tools and real skill. Most beginners stick with linoleum.
Carving Tools That Actually Work:
The truth about cheap sets: Those $10 sets with interchangeable blades? They dull almost immediately and make carving frustrating. You'll fight the material instead of working with it. If budget is tight, buy ONE good tool (a #1 or #2 V-gouge from Pfeil or Flexcut) rather than a cheap set.
Worth the investment: Pfeil (Swiss Made) tools are expensive but last decades with proper care. Flexcut offers good mid-range options. Learn to sharpen your tools—it's not optional.
Block and Plate Materials Compared
| Material | Best For | Top Brands | Reality Check |
|---|---|---|---|
| Grey Linoleum | Fine detail, clean lines, most relief printing | Speedball, Essdee, Battleship | The standard—warm it slightly if stiff |
| Soft Rubber/Vinyl | Beginners, fast carving, stamps | Speedball Speedy-Carve, Soft-Kut | Easy to cut but details can be mushy |
| End-Grain Wood | Wood engraving, ultra-fine detail | McClain's, specialty suppliers | Requires specialized tools and skill |
| Plank Wood | Bold woodcuts, organic grain texture | Shina plywood, cherry, poplar | Grain direction affects carving |
Intaglio and Etching Supplies (The Chemistry)
Intaglio printing produces some of the most beautiful, rich prints possible—Rembrandt was an etcher—but it involves real chemistry and requires respect for the materials.
Understanding Edinburgh Etch (The Modern Standard):
Traditional etching used nitric acid, which produces toxic fumes and can cause severe burns. Edinburgh Etch, developed in 1997, changed everything. It's a mixture of ferric chloride and citric acid that etches copper plates accurately without toxic fumes. It's still corrosive (goggles and gloves are mandatory), but it's dramatically safer for home studios and doesn't require industrial ventilation.
Metal Plates:
- Zinc: Cheaper, softer, good for beginners. Etches faster and more aggressively—watch your timing.
- Copper: The traditional choice. Holds finer detail, etches more controllably, lasts longer. More expensive but worth it for serious work.
- Aluminum: Lightweight and inexpensive but less commonly used. Different etching chemistry required.
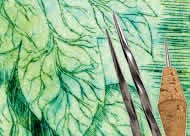
Essential Intaglio Tools:
- Etching needles: For drawing through grounds to expose metal. Various point types for different line qualities.
- Grounds and resists: Protect areas you don't want to etch. Hard ground (for lines), soft ground (for textures), aquatint (for tonal areas).
- Burnishers and scrapers: For corrections and surface work.
Reality check: Intaglio requires a press for serious work (hand burnishing works but is exhausting for editions). Access to a community printmaking studio is how most people start.
Safer and Greener Options
Printmaking has gotten much less toxic in recent decades. Edinburgh Etch replaced nitric acid fumes with a nearly odorless ferric chloride solution. Caligo Safe Wash and Akua inks clean up with soap and water instead of solvents. Soy-based cleanup products replace petroleum-based ones. Water-based screen printing inks eliminate many solvent concerns. If you're working at home or in a shared space, these 'non-toxic' alternatives aren't just environmentally better—they're often the only practical option.
Screen Printing Equipment (Mesh Counts Matter)
Screen printing pushes ink through mesh stencils—simple concept, but the details matter. The mesh count (threads per inch) determines what you can print.
Mesh Count Guide (The Numbers That Matter):
- 110-160 mesh: The workhorses. Good ink deposit, handles most designs. Use 110 for bold graphics on dark shirts (heavy ink coverage) or as your underbase. 156 is the most versatile general-purpose count.
- 180-230 mesh: For finer detail and halftones. Less ink passes through, so prints feel softer but colors are less vivid on dark fabrics. 230 is where detailed photographic work begins.
- 230-305 mesh: Fine art territory. Thin inks, precise detail, CMYK process printing. Requires more skill to expose and print but capable of photorealistic results.
- Below 110 (60-86): Specialty use only—glitter inks, shimmer effects, anything with particles that would clog finer mesh.
Other Screen Printing Essentials:
- Frames: Newman Roller frames (professional, retensionable), aluminum frames (durable standard), wood frames (cheap but warp)
- Squeegees: Durometer (hardness) matters. Softer (60-70) for fabric, harder (70-80) for paper. TKF polyurethane blades last longer than rubber.
- Emulsions: Diazo emulsions are more forgiving for beginners. Photopolymer emulsions give finer detail but are less tolerant of exposure mistakes.
Beginner setup: Start with 156 mesh screens (most versatile), a 70-durometer squeegee, and Speedball water-based inks. You can hand-print without a press, but a simple hinge clamp setup helps with registration.
Inks: Water-Based vs. Oil-Based (The Real Trade-offs)
Every printmaking ink debate comes down to the same question: ease of cleanup versus working properties. Here's the honest breakdown:
Water-Based Inks:
Pros: Clean up with soap and water, dry faster, safer studio environment, better for shared spaces and homes.
Cons: Dry on your screen/block if you work slowly, can be less vibrant, may require more passes for coverage.
Best options: Speedball water-based (affordable, widely available), Schmincke Aqua Linoldruck (superior quality but pricier).
Oil-Based Inks:
Pros: Longer open time (won't dry while you're working), richer colors, traditional working feel, superior results for fine art editions.
Cons: Require solvents for cleanup (or vegetable oil followed by soap), longer drying times, studio ventilation considerations.
Best options: Caligo Safe Wash (oil-based but cleans with dish soap—seriously, best of both worlds), Gamblin Relief Ink (professional quality), Charbonnel (the intaglio gold standard).
By Technique:
- Relief printing: Caligo Safe Wash is the go-to recommendation. Speedball water-based works fine for learning.
- Intaglio: Charbonnel or Graphic Chemical. This is where oil-based quality really matters.
- Screen printing: Speedball Acrylic for beginners, Union Ink or Nazdar for production, water-based for fabric printing at home.
- Lithography: Van Son or specialty litho inks. This isn't beginner territory.
Printing Presses (Do You Actually Need One?)
Printing presses provide consistent, repeatable pressure—but they're expensive and heavy. Here's when you actually need one:
Relief Printing: Press Optional
Hand burnishing with a baren or wooden spoon works fine, especially for small editions. A press speeds up the process and provides more consistent results, but plenty of professional relief printers work by hand. If you want a press, tabletop models from Blick or Woodzilla are relatively affordable entry points.
Intaglio: Press Essentially Required
The pressure needed to force paper into etched lines is significant. You CAN print small intaglio plates by hand, but it's exhausting and inconsistent. For serious intaglio work, you need a press—and they're not cheap. Takach and Conrad Machine make professional models; Blick offers more affordable options. Many printmakers access presses through community studios.
Screen Printing: Manual Presses Help
You can hand-print screens without a press, but a simple one-color press or hinge clamp setup dramatically improves registration (lining up multiple colors). For production work, multi-color presses with registration systems are standard.
Lithography: Specialized Press Required
Lithography requires a scraper-bar press that applies very specific pressure. These are specialized, expensive, and heavy. This is why most artists learn and work in professional studio settings.
Hand Printing Without a Press (It Works)
No press? No problem—at least for relief printing. Hand printing is how printmaking was done for centuries, and it still produces beautiful results.
Hand Printing Tools:
- Wooden spoon: The classic. Any sturdy cooking spoon with a smooth back works. Press and rub in circular motions. Free if you raid your kitchen.
- Baren: The Japanese traditional tool. Speedball makes affordable versions; traditional bamboo barens provide more control. Ball barens (like the Speedball Ball Baren) offer consistent pressure.
- Bone folder: Good for small areas and detail work. Less useful for overall burnishing.
Technique Tips:
The key is consistent pressure and patience. Work systematically from center outward. Peel back a corner periodically to check your progress—you can always burnish more, but you can't un-print a smudge. Japanese papers (thin, strong, absorbent) work particularly well for hand printing because they require less pressure than heavier Western papers.
Reality check: Hand printing works great for small editions and for prints up to about 12x12 inches. Larger blocks or long editions make a press much more practical—your arm will thank you.
Paper Selection (It Matters More Than You Think)
Wrong paper ruins good prints. Different techniques need different paper characteristics—weight, absorbency, surface texture, and sizing all matter.
Paper by Technique (What Actually Works)
Relief Printing Papers:
- Japanese papers (Kozo, Gampi, Mulberry): Thin, strong, absorbent. Perfect for hand printing—requires less pressure, picks up fine detail beautifully. Relatively inexpensive.
- Rives BFK: The workhorse Western paper for relief. Soft, absorbent, beautiful quality. More expensive but worth it for final editions.
- Stonehenge: Smooth, consistent, affordable. Great for proofing and student work.
Intaglio Papers:
- Hahnemühle Copperplate: Made specifically for etching. Soaks up ink from recessed lines, handles the pressure.
- Somerset: Versatile, beautiful surface. Works for most intaglio techniques.
- Arches Platine: Smooth, bright white, professional quality.
- Note: Intaglio papers are soaked before printing—the dampness helps pull ink from the plate.
Screen Printing Papers:
- Stonehenge: Handles multiple passes and thick ink deposits well.
- Arches Cover: Heavy, durable, great for fine art screen prints.
- French Paper and commercial stocks: Good for poster-style work.
Proofing tip: Don't use expensive paper for test prints. Newsprint or cheap drawing paper lets you check registration and inking without wasting good sheets. Save the nice paper for your final edition.
⚠️ Important:
Etching Chemistry Matters: Traditional etching used nitric acid, which produces toxic fumes and can cause serious chemical burns. Modern alternatives like Edinburgh Etch (ferric chloride with citric acid) are significantly safer—no toxic fumes, more controlled bite, easier disposal. If you're setting up a home studio for etching, Edinburgh Etch is the way to go. But 'safer' doesn't mean 'safe'—ferric chloride is still corrosive. Goggles, gloves, and a dedicated workspace with a sink are non-negotiable.
Storage and Organization (Protect Your Work)
Prints, plates, and screens represent hours of work. Proper storage isn't glamorous but matters.
Storage Solutions
- Prints: Flat storage is essential—flat files are ideal but expensive. At minimum, store prints flat between glassine or acid-free tissue, away from light and humidity. Portfolios work for smaller editions.
- Plates and blocks: Keep linoleum blocks flat to prevent warping. Metal plates should be interleaved with newsprint to prevent scratching. Store upright in a rack if you have many.
- Screens: Store vertically in a rack—laying screens flat can cause mesh sag and frame warping. Clean screens thoroughly before storage.
- Inks: Keep lids tight. Oil-based inks can skin over but usually remain usable beneath the skin. Water-based inks dry out faster—add a drop of water if thickening. Store away from temperature extremes.
- Chemicals: Proper ventilated storage, clearly labeled, away from children and pets. Check local disposal regulations—don't pour mordants down the drain.
The $75 Entry Point: If you want to try printmaking without major investment, start with relief printing. A Speedball linoleum block ($5-10), a basic carving tool set ($15-25), water-based relief ink ($10-15), a soft rubber brayer ($15-20), and some decent paper ($10-15) gets you making actual prints. No press required—a wooden spoon or baren works fine. This is the only printmaking technique where the startup cost is genuinely low.
Types of Printmaking
Relief Printing — You carve away what you don't want to print, leaving raised surfaces that receive ink. The most beginner-friendly technique: no press required, no chemicals, minimal space. Linocut (linoleum) is easier to carve than wood and more forgiving of mistakes. Start here.
Intaglio Printing — The opposite of relief: ink goes INTO recessed lines. Includes etching (acid bites lines into metal), drypoint (scratched directly), engraving (cut with tools), and aquatint (tonal areas). Rich, detailed results, but requires chemistry knowledge and usually a press. Edinburgh Etch has made home studios more practical.
Lithography — Based on oil and water repelling each other. You draw with greasy materials on stone or aluminum; water adheres where there's no grease, ink adheres where there is. Capable of incredible subtlety but notoriously difficult—most artists work with master printers. Professional technique.
Screen Printing — Ink pushed through mesh stencils. Great for bold graphics, multiple colors, fabric printing. Space-intensive but accessible for determined home printers. T-shirts, posters, fine art editions—very versatile once you have the setup.
Shop Printmaking Supplies
Professional printmaking supplies for every application
Fabric/Acrylic Transparent Base
by Speedball

$14.62
Fabric Squeegee
by Speedball

$10.81
Fabric Block Printing Starter Kit
by Speedball

$33.41
Fabric & Paper Block Printing Ink Kit
by Speedball

$31.90
Essential Tools Kit
by Speedball

$56.01
Block Printing Starter Kit
by Speedball

$29.69
Block Printing Metallic Ink Set
by Speedball

$16.71
Block Printing Fabric Ink Medium
by Speedball

$9.52


