Purchase Guide: Sculpting

Sculpting Purchase Guide

Sculpting Purchase Guide

Sculpture is the most physical of the arts. You're not just making marks on a surface—you're building form in three dimensions, fighting gravity, understanding how materials behave under stress, and thinking around all sides of an object simultaneously. Whether you're pushing clay, cutting wood, or grinding stone, sculpture demands that you understand your materials intimately. The clay that cracks during firing, the gouge that won't hold an edge, the stone that fractures along hidden seams—these aren't random failures. They're materials behaving according to their nature, and understanding that nature is what separates frustration from success.

The Learning Curve Is Real: Sculpture has a steeper learning curve than most art forms because you're managing material properties, structural engineering, and artistic vision simultaneously. Start with forgiving materials—soft clay, basswood, soapstone—before graduating to porcelain, hard maple, or marble. Every material teaches different lessons.

What's in This Guide

Understanding Clay (It's More Complicated Than It Looks)

Clay seems simple—wet earth you can shape with your hands. But the difference between a successful fired sculpture and a pile of cracked shards comes down to understanding what's actually happening inside the material. Sculpting clays fall into two fundamentally different categories, and choosing wrong means either your piece can't be fired or your maquette dries out mid-project.

Water-Based Clays (Ceramic Clays)

These are your Amaco, Laguna, and Standard Ceramic clays. They dry through evaporation, can be fired in kilns for permanence, and are what most people picture when they think "clay." But they shrink—significantly. Total shrinkage from wet to fired typically runs 8-12%, which means a 12-inch sculpture becomes roughly 10.5 inches after firing. For architectural work or pieces that must fit specific dimensions, you need to build larger and account for this shrinkage precisely.

The shrinkage happens in two stages. Drying shrinkage occurs as water evaporates from between clay particles until they're all touching (the "leather hard" stage). Firing shrinkage happens as the kiln drives off chemically bonded water and the particles fuse together. Porcelain shrinks the most (10%+ in firing alone), earthenware the least (3-4%). Stoneware falls in between.

Oil-Based Clays (Never Harden)

Chavant NSP, Monster Clay, and Roma Plastilina are oil-and-wax based compounds that never dry out. You can work on a piece for months, set it aside for years, and pick up where you left off. This makes them essential for maquettes destined for mold-making and foundry work—you sculpt the original, make a mold, and cast the final piece in bronze, resin, or plaster.

The tradeoff: oil-based clays can't be fired. They're sculpting materials only, not final materials. And they're temperature-sensitive—soft in warm studios, firm in cold ones. Professional sculptors often keep different firmnesses on hand and sometimes choose different clays for summer versus winter work.

Monster Clay vs. Chavant NSP (The Debate That Never Ends)

Ask sculptors which oil-based clay is best, and you'll get strong opinions. Both are professional-grade, sulfur-free (safe for platinum silicone molds), and reusable indefinitely. The differences come down to working properties.

Monster Clay is firmer at room temperature and less sticky. It doesn't cling to tools as much, which many sculptors prefer for carving and achieving clean, crisp edges. When you have more material than you need and plan to carve away, Monster Clay excels. It also melts to a smoother liquid for pouring. The downside: it can feel hard and unworkable when cold. Most sculptors keep a heat gun or warming tray handy.

Chavant NSP is stickier, which helps when building up layers gradually—small additions bond readily to the surface. If your sculpting style involves adding material bit by bit rather than blocking out and carving back, Chavant may feel more natural. It's also been around longer and has generations of sculptors comfortable with its quirks. The stickiness that helps with building up can be frustrating when trying to achieve smooth surfaces; many sculptors dust talc powder on the surface to help blend without pulling material.

Both come in Soft, Medium, and Hard grades. Importantly, Chavant's "Medium" feels similar to Monster Clay's "Soft"—the firmness scales aren't identical between brands. The only way to know which suits you is to try both. Buy small amounts first.

💡 Pro Tip:

Starting Out? Many experienced sculptors recommend beginners start with water-based clay (WED clay or similar) despite its drying issues. It's cheaper, forces you to make decisions (you can't endlessly fiddle), and teaches fundamental form-building quickly. Graduate to oil-based clays once your sculpting vocabulary is established.

Why Clay Cracks (And How to Prevent It)

Cracking is the most common failure mode for ceramic sculpture, and it almost always traces back to uneven drying or firing. When one part of a sculpture dries or shrinks faster than an adjacent part, stress builds at the boundary. If the stress exceeds the clay's strength, it cracks.

During Drying

Thin sections dry faster than thick sections. Exposed areas dry faster than covered areas. If you sculpt a figure with thin arms and a thick torso, the arms will try to shrink while the torso is still wet—stress builds at the joints, and cracks appear. Prevention: dry slowly under plastic, rotating the piece so all sides get equal air exposure. Keep thick and thin sections as consistent as possible, or hollow out thick areas.

During Firing

The most dangerous moment is "quartz inversion" at 573°C (1064°F). At this temperature, silica crystals in the clay suddenly rearrange their structure, causing a slight expansion. If the kiln heats or cools too fast through this zone, the outside expands or contracts before the inside catches up—crack. Large sculptures need slow firing schedules: hours, not minutes, to pass through critical temperatures.

For large work, professional sculptors build on "shrink slabs"—perforated clay platforms made from the same clay body, loaded under the piece and fired with it. The slab shrinks at exactly the same rate as the sculpture, eliminating friction against the kiln shelf that can cause warping or cracking.

Choosing the Right Clay Body

Hardening clays for fired sculpture need to match your kiln capabilities and structural requirements.

By Firing Temperature

Earthenware (Cone 04-06): Low-fire clays that remain somewhat porous after firing. Brighter glaze colors, but less structural strength. Good for decorative work, not outdoor installation.

Stoneware (Cone 6-10): The workhorse of sculptural ceramics. Dense, strong, weather-resistant. Most sculpture clays fall in this range. Laguna WC-617 and similar grogged bodies are specifically designed for hand-building large forms.

Porcelain: Beautiful but demanding. High shrinkage (plan for 12-15% total), prone to warping, requires precise firing schedules. Worth the effort for translucent detail work; not recommended for large structural pieces or beginners.

Grog Makes a Difference

Grogged clays contain pre-fired clay particles that reduce shrinkage, increase thermal shock resistance, and add structural strength. For sculpture larger than about 8 inches, grogged clay is almost mandatory. The texture may be too coarse for fine detail, so some sculptors use smooth clay for surface details and grogged clay for structure, joining at leather-hard stage.

Armatures: The Skeleton Inside

Armature systems provide internal support for clay sculptures. Without them, anything taller than it is wide will slump under its own weight.

For Oil-Based Clay (Permanent Armatures)

Since oil-based clay never hardens, the armature stays inside permanently (or until you mold and cast the piece). Use whatever works: aluminum wire for small pieces, steel rod or pipe for larger work, even wooden dowels or PVC. The armature just needs to support the clay's weight without moving.

For Water-Based Clay (Temporary or Burnable)

Here's the challenge: if clay shrinks around a rigid armature that doesn't shrink, something has to give—usually the clay cracks. Options include:

  • Removable armatures: Build around wire or pipe that you extract before the clay shrinks too much (leather-hard stage)
  • Paper/cardboard cores: Burn out during firing, leaving hollow space
  • Newspaper/foam: Shrinks or compresses as clay contracts
  • Hollow construction: Skip the armature entirely; build walls thick enough to be self-supporting, leave hollow inside

For figures, the hollow construction method dominates professional ceramic sculpture. You're essentially building a clay shell with consistent wall thickness throughout.

Armature Wire Selection

Material Gauges Best For Notes
Aluminum 1/16" - 1/4" Small to medium oil-clay pieces Easy to bend, lightweight, won't rust
Steel 1/8" - 1/2" Large sculptures, heavy clay loads Strong but rusts; can be welded for complex forms
Brass 1/16" - 3/16" Jewelry-scale work, detail armatures Won't corrode, aesthetically pleasing if visible
Stainless Steel 1/8" - 3/8" Outdoor installations, permanent work Maximum corrosion resistance, expensive

Wood Carving: Understanding Sweep Numbers

Wood carving tools from Flexcut, Pfeil, and Two Cherries are marked with numbers that confuse every beginner. Here's what they actually mean.

A gouge is described by two numbers: the sweep (curvature of the cutting edge) and the width. A "7/16" gouge has sweep #7 and is 16mm wide. The higher the sweep number, the deeper the curve:

  • #1: Flat (technically a chisel)
  • #2: Skew chisel (in Sheffield system)
  • #3: Very shallow curve—almost flat, for gentle surface shaping
  • #5: Medium curve—the most versatile all-around sweep
  • #7: Deeper curve—good for recesses and drapery folds
  • #9: Deep U-shape—approximately half a circle
  • #11: Veiner—deep U-shape, narrower than #9

Here's what confuses people: a #7 gouge in 10mm width and a #7 gouge in 25mm width don't cut the same radius circle. The sweep number describes the proportional curvature relative to width, not an absolute radius. So you can't necessarily fit a narrower gouge into a cut made by a wider one of the same sweep. Professional carvers accumulate many gouges over time, learning which specific tools fit which cuts.

Starting Set

Don't buy a 50-piece set. Start with 4-5 tools: a #5 gouge (15-20mm), a #7 or #9 gouge (10-15mm), a V-tool (60° or 90°), a flat chisel, and a carving knife. Add tools as you encounter specific needs your current set can't handle.

The Sharpening Reality

Here's what nobody mentions when selling you carving tools: you'll spend almost as much time sharpening as carving, especially when learning. A dull gouge requires more force, gives you less control, and tears rather than cuts—which is both frustrating and dangerous.

Sharpening Systems:

  • Arkansas stones: Traditional, affordable, work well. Require oil. Good for maintaining edges, slower for major reshaping.
  • Shapton/Japanese waterstones: Cut faster, require water, wear faster. Many carvers prefer these for their speed.
  • Tormek/powered systems: Expensive but fast and consistent. Worth it if you carve frequently or professionally.

Stropping: After every 20-30 minutes of carving, run your edge across a leather strop charged with polishing compound. This removes the micro-burr that develops during use and keeps the edge keen without removing metal. Most carvers strop constantly and only go back to stones when stropping stops restoring the edge.

The curve inside a gouge (the "flute") is the hardest part to sharpen properly. Specialized "slipstones" match gouge profiles—buy ones that fit your sweeps.

⚠️ Important:

The Safety Rule Nobody Breaks Twice: Always carve away from your body, and never put any body part in the path of the tool. Sharp tools are safer than dull tools—they go where you direct them rather than requiring force that can slip. If you need more power, use a mallet rather than pressing harder. A cut-resistant glove on your non-tool hand is cheap insurance.

Stone Carving: Silica Is the Hidden Danger

Stone carving tools from Trow & Holden, Milani, and Cuturi enable sculptors to work in humanity's most permanent medium. But before discussing tools, we need to discuss lungs.

Silicosis Is Real and Incurable

Crystalline silica—the primary component of granite, sandstone, and quartz—becomes respirable dust when you cut, grind, or carve stone. Inhaling this dust causes silicosis: irreversible lung scarring that progressively destroys your ability to breathe. There is no treatment. The damage accumulates with every exposure. About 2.3 million workers in the U.S. are exposed to silica; it's one of the most common occupational hazards that sculptors face.

The dust particles are tiny—100 times smaller than beach sand—and you can't always see them. By the time you notice a dusty haze, you've already inhaled dangerous amounts.

Which Stones Are Dangerous?

High silica content (most dangerous): Granite, sandstone, quartz, onyx—require full respiratory protection and dust control

Lower silica content: Limestone, marble (some varieties), soapstone, alabaster—still produce hazardous dust but at lower concentrations

Generally safe: Some marbles (pure calcium carbonate), jade, lapis lazuli—little to no free silica

Don't assume. Some stones marketed as "marble" are geologically something else entirely. When in doubt, treat all stone dust as hazardous.

⚠️ Important:

Minimum Protection for Stone Carving: Wet cutting/grinding (water suppresses dust), P100 respirator (NOT just N95 for high-silica stone), sealed safety goggles, hearing protection with power tools. Work outdoors or with dust collection. Never dry sweep—use wet methods or HEPA vacuum. The OSHA permissible exposure limit was cut in half in recent years because the old standard wasn't protective enough.

Stone Carving Tool Progression

Stone sculpture proceeds in stages, each requiring different tools:

Roughing Out

Point chisels: The first tool to touch the stone. Removes material quickly, leaves a rough texture. You're establishing overall form, not detail.

Shaping

Tooth chisels (claws): Multiple points in a row. Refine the form from roughing, create intermediate textures. The workhorse of middle-stage carving.

Finishing

Flat chisels: Smooth surfaces, final shaping. Requires more control—mistakes show.

Roundels: Curved-edge flat chisels for concave surfaces.

Rasps and rifflers: Final smoothing before polishing. File-like tools for stone.

Soft Stone vs. Hard Stone

Soapstone and alabaster can be carved with hand tools alone—some sculptors use nothing but rasps and files for the entire process. Marble requires traditional hammer-and-chisel technique. Granite typically demands pneumatic tools or angle grinders with diamond blades. The harder the stone, the more specialized (and expensive) the tooling.

Beginners should start with soapstone. It's forgiving, carves easily with minimal tools, and produces less hazardous dust than high-silica stones. Vermont soapstones are generally asbestos-free; some New York soapstones may contain asbestos—check your source.

Modeling Tools for Clay Work

Sculpting modeling tools from Kemper, Xiem, and Mudtools are what your hands use when fingers aren't precise enough.

Wire-End Tools

Loops of wire on handles—essential for removing material, hollowing forms, and creating undercuts. Different loop sizes and shapes (round, square, ribbon) serve different purposes. Buy several sizes.

Wooden Tools

Boxwood, rosewood, or other hardwoods shaped into various profiles. Won't scratch clay, create smooth surfaces, good for burnishing. Traditional and still effective.

Metal Ribs and Scrapers

Flexible metal sheets with shaped edges. Essential for smoothing surfaces, creating precise profiles, and refining forms. Stainless steel resists corrosion from wet clay.

Texture Tools

Anything that creates surface pattern: combs, stamps, found objects. Many sculptors make their own texture tools from carved wood, 3D-printed forms, or modified household items.

Mold Making: How Reproductions Happen

Professional mold making enables casting multiple copies from a single sculpture. It's also how oil-based clay sculptures become permanent—you don't keep the original; you cast it in bronze, resin, concrete, or another material. Molding compounds from Smooth-On, Polytek, and Alumilite are the industry standards.

Silicone Rubber Molds

The dominant choice for sculptural mold making. Flexible enough to release from undercuts, durable enough for multiple castings, won't stick to most materials. Two main types:

Tin-cure silicone (like Smooth-On's Mold Max series): 10:1 mix ratio by weight, 45-minute pot life, cures overnight. Less expensive. Molds last about 5 years with proper storage. The tin catalyst can cause dermatitis—wear gloves.

Platinum-cure silicone (like Dragon Skin, Mold Star): 1:1 mix ratio, various cure times available. More expensive but more dimensionally stable—essentially no shrinkage. Molds can last 45+ years. Won't cure if contaminated by sulfur (some clays) or latex (some gloves). Always do a small test patch.

Pot Life and Work Time

"Pot life" means how long you have to pour or brush the material after mixing before it starts setting. Temperature dramatically affects this—cold environments extend pot life; warm environments shorten it. If your studio runs hot, you may need to mix smaller batches or work faster. Some silicones have accelerators available to speed cure time when needed.

Casting Materials and Considerations

Casting resins and other materials fill your molds to create the final pieces.

Polyurethane Resin

Fast-curing, rigid, accepts paint well. The most common choice for prop replicas and small-run sculpture editions. Some formulations can be rotational-cast (slush-cast) to create hollow pieces that use less material.

Epoxy Resin

Stronger than polyurethane, slower cure, can be tinted or filled with metal powders for cold-cast bronze effects. Warning: sensitization risk is real—you can develop permanent allergy to epoxy after months or years of exposure. Wear nitrile gloves (NOT latex—epoxy penetrates latex) and work in ventilated spaces.

Plaster and Gypsum

Economical for large pieces. Casting plaster and Hydrostone work well for indoor sculpture. Not weather-resistant without sealing.

Concrete/GFRC

For outdoor installations. Glass-fiber reinforced concrete (GFRC) creates strong, lightweight architectural pieces. Requires learning specialized techniques.

Bronze (Foundry Casting)

The most permanent sculptural material. Requires a foundry—you make the mold and wax positive, the foundry handles the actual metal casting. Expensive but irreplaceable for major commissions.

Release Agents: Why Molds Stick (or Don't)

Release agents prevent materials from bonding to each other. Use wrong or skip entirely, and you'll be destroying molds or originals trying to separate them.

When You Need Release Agent

  • Making silicone molds from silicone originals (silicone sticks to silicone)
  • Casting plaster into plaster molds
  • Any time you're uncertain about compatibility

When You Usually Don't

  • Casting polyurethane or epoxy resin into silicone molds (they release naturally)
  • Making silicone molds from most oil-based clays (if sulfur-free)

Types

Spray release (Ease Release 200): Convenient, uniform coverage, works on most surfaces

Paste wax: Traditional, multiple coats, excellent for plaster work

PVA (polyvinyl alcohol): Water-soluble barrier film, good for fiberglass and resin applications

When in doubt, test. Apply a small amount of your mold material to a non-critical area of your original and see if it releases cleanly.

💡 Pro Tip:

Silicone Cure Inhibition: Platinum-cure silicones won't cure properly when exposed to sulfur (some modeling clays, latex gloves), certain rubbers, and some 3D printing resins. If your silicone stays tacky or gummy instead of curing, contamination is likely the cause. Solution: seal the original with a clear acrylic lacquer barrier coat before applying silicone, or switch to tin-cure silicone which is less sensitive.

Digital Tools in Traditional Sculpture

Contemporary sculpture increasingly bridges digital and physical. Even traditional sculptors benefit from digital integration.

3D Scanning

Document existing work for insurance, archives, or reproduction. Scan found objects to manipulate in software before physical fabrication. Create digital backups of fragile originals.

3D Printing

Print maquettes at any scale to evaluate proportions. Create patterns for mold making. Produce complex geometric forms impossible to model by hand. The printed piece often isn't the final—it's the starting point for mold making and casting in traditional materials.

CNC Machining

Computer-controlled carving scales digital designs into physical form. Used for large-scale stone and wood pieces where hand carving would take prohibitive time. The machine does roughing; hand finishing provides the final surface.

Digital Sculpting Software

ZBrush, Mudbox, and Blender let you sculpt virtually before committing to physical materials. Useful for client approvals, iteration, and planning complex pieces. The skills transfer imperfectly—digital sculpting doesn't teach you how materials actually behave—but it's a valuable complement to physical work.

Sustainable Studio Practices: Reclaim and reprocess clay scraps—wet down bone-dry clay, wedge, reuse. Oil-based clays are infinitely reusable. Use local stone when possible. Implement dust collection (good for lungs and neighbors). Properly dispose of solvents through hazardous waste programs. Silicone mold scraps can sometimes be ground and used as filler in new batches.

Realistic Starter Kit (~$150): 25 lbs water-based sculpture clay (Amaco, Laguna) + basic wire tool set + wooden modeling tools + armature wire + access to a kiln (community studio, school, or rental). This gets you sculpting immediately while you learn whether this is your medium. Upgrade from there based on what direction your work takes.

Frequently Asked Questions

What's the difference between water-based and oil-based clay?

Water-based clays (Amaco, Laguna, Standard) dry through evaporation and can be fired in kilns to become permanent ceramic. They shrink 8-12% from wet to fired. Oil-based clays (Chavant NSP, Monster Clay) never dry out—you can work indefinitely—but they can't be fired. Oil-based clay is for making originals that will be molded and cast in other materials; water-based is for finished ceramic pieces.

Why does my clay crack during drying or firing?

Uneven shrinkage. When one part of the sculpture dries or shrinks faster than another, stress builds at the boundary until something gives. Solutions: maintain consistent wall thickness (hollow out thick sections), dry slowly under plastic with even air exposure, fire slowly through critical temperature zones (especially quartz inversion at 573°C), use grogged clay for large work.

How do I choose between Monster Clay and Chavant NSP?

Personal preference. Monster Clay is firmer and less sticky—better for carving back and achieving crisp edges. Chavant is stickier—better for building up gradually. Chavant Medium feels similar to Monster Clay Soft (the firmness scales differ between brands). Try small amounts of both to see which suits your working style. Both are professional-quality and sulfur-free for silicone mold compatibility.

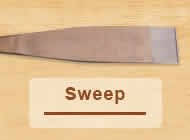
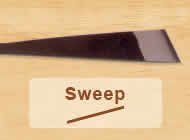
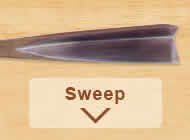
Which wood carving tools should I start with?

Don't buy a big set. Start with 4-5 tools: a #5 gouge (15-20mm wide), a #7 or #9 gouge (10-15mm), a V-tool (60° or 90°), a flat chisel, and a carving knife. Flexcut and Pfeil both make quality beginner sets. Add tools as specific needs arise. Budget equally for sharpening supplies—you'll spend significant time maintaining edges.

What safety equipment do I need for stone carving?

At minimum: P100 respirator (not just N95 for high-silica stones), sealed safety goggles, hearing protection with power tools. Use wet cutting methods to suppress dust. Work outdoors or with dust collection. Never dry sweep—use wet methods or HEPA vacuum. Stone dust exposure causes silicosis, an incurable lung disease. Granite, sandstone, and quartz are highest risk; soapstone and marble are lower but still hazardous.

Why won't my silicone mold cure properly?

Probably contamination (platinum-cure silicones only). Sulfur-containing clays, latex gloves, certain rubbers, and some 3D printing resins inhibit platinum-cure silicone. The mold stays tacky or gummy instead of curing. Solutions: seal your original with clear acrylic lacquer before molding, switch to tin-cure silicone (less sensitive), or test on a non-critical area before committing to the full mold.

How do I make hollow ceramic sculpture?

Build clay walls of consistent thickness (typically 3/4" to 1" for large work) rather than solid forms. Start with a "shrink slab" base made from the same clay. Build up coil by coil or slab by slab, supporting the form as it grows. The interior can be rough—no one sees it. Let the piece firm to leather-hard before moving to the kiln. Support cantilevered sections during firing with props made from the same clay body.

What's pot life and why does it matter?

Pot life is the working time after mixing two-part materials (silicone, resin, epoxy) before they start setting. Temperature dramatically affects it—cold extends, warm shortens. If your studio runs hot, mix smaller batches or work faster. Running out of pot life mid-pour creates visible seam lines in molds or partially-cured areas in castings.

Can I mix different clay types together?

Only clays with similar firing temperatures and shrinkage rates. Mixing earthenware with stoneware will cause cracking—they shrink at different rates and mature at different temperatures. Test small batches before committing. Polymer clays (Sculpey, Fimo) can generally be blended but test for compatibility with specific formulations.

How long do silicone molds last?

Tin-cure silicone molds typically last about 5 years with proper storage (clean, dry, assembled, out of direct light). Platinum-cure silicone molds can last 45+ years because they don't break down the same way. Mold life also depends on what you cast—abrasive materials like concrete wear molds faster than smooth resins or wax.

Straight Chisels

Straight Chisels (#1 sweep) have flat cutting edges for clean, precise cuts. The foundation tool—use for smoothing surfaces, squaring corners, and establishing flat planes. Flexcut and Pfeil models hold edges well.

Straight Gouges

Straight Gouges range from shallow (#3) to deep (#9-11) sweeps. Your primary shaping tools—the #5 and #7 sweeps handle most general carving tasks. Buy these first and best; you'll use them constantly.

Short Bent Tools

Short Bent (Spoon) Tools curve sharply near the cutting edge for accessing concave areas and making scooping cuts. Essential for bowl carving and deep relief work where straight tools can't reach.

Long Bent Tools

Long Bent Tools have gentler curves extending further back, enabling long sweeping cuts in deep hollows. Professional tools for complex sculptural forms requiring access at awkward angles.

Skew Chisels

Skew Chisels have diagonal cutting edges for clean entry and exit cuts, reaching into corners, and creating crisp lines. Particularly useful for lettering, geometric patterns, and detail work.

Parting Tools

V-Tools (Parting Tools) cut V-shaped grooves for outlines, hair texture, lettering, and separating design elements. Available in angles from acute (tight V) to obtuse (wide V). Harder to sharpen than gouges—the inside corner is tricky.

Fishtail Tools

Fishtail Tools flare outward at the cutting edge, providing wide cuts while the narrower shaft maintains access in tight spaces. Excellent for background clearing in relief work and smoothing broad surfaces.