Purchase Guide: Essential Art Tools

Tools Purchase Guide

Tools Purchase Guide

Nobody comes to an art supply store excited about buying a craft knife. You come because you need to cut something, and you want it to look clean when you're done. The tools in this category aren't glamorous—they're the things that make everything else possible. A sharp blade, a surface that doesn't destroy your table, a light that lets you see what you're doing. Get them right and you forget they exist. Get them wrong and you'll curse them every time you work.

This guide covers the decisions that actually matter: which blade for which job, when your cutting mat is truly done, whether you need a light box or just better overhead lighting. We'll skip the brand-name worship and focus on what these tools actually do differently from each other.

The Real Investment: A good craft knife costs under $15. The cutting mat under it might run $25-40. Task lighting that doesn't strain your eyes could be $50-100. These aren't expensive purchases—but cheap versions of any of them will frustrate you for years. Buy once, buy right.

In This Guide

Choosing a Cutting Knife (It's Not All X-Acto)

X-Acto became synonymous with craft knives the way Kleenex became synonymous with tissues, but they're not the only option. Olfa and NT Cutter make excellent alternatives, and the blade you choose matters more than the handle you hold.

The confusion starts with the numbering system. When you see "#11 blade," that's not a size—it's a shape. The numbers were assigned somewhat arbitrarily by X-Acto decades ago and now function as an industry-wide code.

What the Blade Numbers Actually Mean

The #11 blade is the workhorse—the classic fine-pointed blade that comes standard with most X-Acto #1 handles. It's what you reach for when cutting paper, cardstock, thin plastic, balsa wood, and most general craft materials. The sharp point handles detailed work, while the flat edge along one side lets you make longer cuts. Most people never need anything else.

The #10 blade has a curved cutting edge (sometimes called a drop-point), useful for carving, slicing, and whittling where you want more control over cut depth. Think sculpting foam or shaping soft materials rather than precision cutting.

The #16 blade is smaller than the #11 and offset forward slightly, designed for scoring and making shallow cuts. If you're folding cardstock along scored lines or doing paper engineering, this is your blade. It's also useful for delicate curves because the short blade changes direction easily without tearing.

The #17 and #18 blades are essentially small chisels. The #17 is lightweight, the #18 is heavy-duty. Use these for scraping, removing small amounts of material, or working on wood and harder surfaces where a pointed blade would just snap.

Handles and the Price Question

X-Acto's #1 handle is slim aluminum, designed for the #11 and similar small blades. Their #2 handle is heavier, meant for #18 and larger blades that need more leverage. Olfa's equivalent system uses snap-off blades in retractable housings—less precision, but safer and more convenient for production work.

Is a $12 X-Acto knife better than a $4 craft knife from the dollar store? Usually, yes—the collar that grips the blade is machined more precisely, so the blade doesn't wobble. But the blade is what does the cutting. A cheap handle with a fresh, quality blade beats an expensive handle with a dull one every time.

The real money difference is in blade longevity. X-Acto and Olfa blades typically maintain their edge longer than generic alternatives. For professional use where you're changing blades daily, this adds up. For occasional home use, it barely matters.

⚠️ Important:

When to Change Blades: If you're pressing harder than usual, if cuts are tearing instead of slicing cleanly, or if you see any rolling or nicking on the edge—the blade is done. Dull blades are more dangerous than sharp ones because they slip instead of cutting. Professional users often change blades daily. Hobbyists might get weeks from a single blade depending on materials and use.

When You Need More Than a Craft Knife

Utility knives (box cutters, Stanley knives) handle jobs that would destroy a craft knife blade—mat board, thick cardboard, leather, rubber, foam core. The blades are thicker, the handles are designed for grip rather than precision, and the retractable blade housing protects you during storage.

Olfa makes snap-off blade utility knives that give you a fresh edge without changing the whole blade—snap off the dull segment and keep working. This is practical for high-volume cutting but creates small, sharp blade fragments that need proper disposal.

For cutting straight lines on thick materials, utility knives work better than craft knives. For detailed curves or precision trimming, stick with craft knives. Many artists keep both.

The Cutting Mat Question

You need something between your blade and your table. A cutting mat protects your work surface and, just as important, protects your blade—cutting into wood or glass dulls blades almost instantly. But "cutting mat" covers everything from cheap plastic rectangles to professional self-healing surfaces, and they're not interchangeable.

How Self-Healing Mats Actually Work

"Self-healing" sounds like magic, but the mechanism is simple: these mats aren't solid. They're made from tiny particles of PVC or similar polymer, pressed together tightly enough to form a firm surface. When your blade cuts through, it passes between particles rather than slicing through them. Once the blade lifts, the particles shift back together—the cut "closes."

This means the mat never truly heals in the biological sense. Deep cuts, especially at angles, can permanently separate particles. Dull blades that saw back and forth rather than slicing cleanly cause more damage than sharp ones making single passes. And over time, the mat dries out, losing the flexibility that lets particles rebound.

Keeping Mats Alive (And Knowing When They're Dead)

Rotate where you cut. Most people have a "comfort zone"—the spot on the mat where they naturally position their work. Consciously move around to distribute wear across the entire surface.

Clean periodically with mild soap and cool water. Debris gets embedded in cut lines and prevents proper healing. A soft brush or wadding can lift threads and fibers from the surface. Avoid harsh chemicals, which can break down the mat material.

Self-healing mats need moisture to stay flexible. If a mat becomes stiff and cuts stop closing, try soaking it flat in cool water for 30 minutes. This won't fix severe damage, but can restore a dried-out mat to usable condition.

When is a mat truly done? When cuts no longer close regardless of treatment. When the grid markings are worn off where you need them. When the surface is so scarred that your blade catches and skips instead of gliding. When fabric catches on the mat surface while you're cutting. A well-maintained quality mat can last years; an abused cheap one might be trash in months.

What Size Mat Do You Need?

Buy bigger than you think. A mat that's "just big enough" means you're constantly repositioning work to keep cuts on the mat surface. Common sizes: 12x18" works for most paper crafts and hobby use; 18x24" gives room for larger projects without dominating a desk; 24x36" covers serious workspace needs.

Thickness matters too. Most hobby mats are around 2-3mm. Professional mats run 5mm or thicker. Thicker mats last longer and protect blades better, but cost more and weigh more. For heavy-duty use with utility knives, thickness is worth the investment.

Rotary vs. Guillotine Trimmers

Paper trimmers come in two fundamental designs: rotary (a blade that rolls along a rail) and guillotine (a blade that swings down). Each has genuine advantages, and the right choice depends on how you work.

Rotary Trimmers: Precision and Large Format

Rotary trimmers use a circular blade mounted in a housing that slides along a guide rail. You push or pull the blade housing along the rail, and the blade rolls through the paper as it goes. This design excels at cutting single sheets or small stacks (typically 1-12 sheets depending on the model) with excellent precision.

Advantages: You can see exactly where the blade will cut while positioning your work. The cutting motion is smooth and controlled—no risk of the blade coming down in the wrong place. Rotary trimmers handle large format work well because the blade travels along the rail; 24" and even 36" rotary trimmers are common. Many models accept interchangeable blades for scoring, perforating, or decorative edges.

Limitations: Rotary trimmers can't handle thick stacks. If you need to cut 25 sheets at once, this isn't your tool. The blade can also cut in both directions (going and coming back), which can shift or tear paper if you're not paying attention.

Guillotine Trimmers: Volume and Thick Materials

Guillotine trimmers use a long, flat blade mounted on a hinged arm. You position the paper, clamp it (on quality models), and bring the blade down through the stack in a single motion. This design handles volume—some guillotine cutters slice through 40-50 sheets of standard paper at once.

Advantages: Speed for repetitive cutting tasks. Ability to cut thick stacks uniformly. Works on heavier materials like mat board or cardstock that would resist a rotary blade. The single decisive cut eliminates any chance of paper shifting mid-cut.

Limitations: Less precision for detail work. You commit to the cut when the blade comes down—no adjusting mid-stroke. Longer guillotines are less common because the blade gets unwieldy. And the exposed blade creates genuine safety concerns that rotary trimmers largely avoid.

Quick Comparison: Trimmer Types

Feature Rotary Trimmer Guillotine
Cutting capacity 1-12 sheets typically 25-50 sheets typically
Precision Excellent—see cut as you work Good—commit when blade drops
Large format Easy—blade travels along rail Limited—blade gets unwieldy
Thick materials Limited—blade designed for paper Excellent—handles mat board
Safety Blade enclosed in housing Exposed blade when raised
Best for Photos, posters, precision work Production, stacks, heavy stock

Light and Magnification: Seeing What You're Doing

Poor lighting causes eye strain, color misjudgment, and physical fatigue. If you're working for any length of time on detailed projects, task lighting isn't optional—it's as important as the tools in your hands.

Color Temperature and CRI (The Numbers That Matter)

Light color is measured in Kelvin (K). Lower numbers are warmer (yellowish), higher numbers are cooler (bluish). Standard incandescent bulbs run around 2700K. Noon sunlight is roughly 5000K. A blue sky (without direct sun) is 6500K.

For art work, you want light in the 5000K-6500K range—"daylight" equivalent. This shows colors accurately and helps you see fine detail. Lower color temperatures add a yellow cast that distorts your perception of what you're making.

CRI (Color Rendering Index) measures how accurately a light source reveals colors compared to natural daylight. The scale runs 0-100, with higher being better. For general work, CRI 80+ is acceptable. For color-critical work—painting, printmaking, fabric selection—look for CRI 90 or higher. Premium art lighting often reaches CRI 95-98.

Both numbers matter. A 5000K bulb with poor CRI will still show colors inaccurately. A high-CRI bulb at 2700K will render colors faithfully but add an overall warm cast. For best results: 5000K-6500K color temperature and CRI 90+.

Light Boxes: More Than Just Tracing

Light boxes provide a backlit surface for tracing, transferring designs, and viewing film or transparencies. Modern LED versions have largely replaced the old fluorescent models—they're thinner, lighter, produce less heat, and last far longer.

Brightness is measured in lux. For tracing through standard drawing paper, 2000-3000 lux is usually sufficient. For heavier papers like watercolor stock (300gsm/140lb), you may need 4000-5000 lux. Most quality LED light boxes now offer adjustable brightness, so you can dial in the level that works for your material.

Size matters for comfort: too small and you're constantly repositioning work; too large and you're paying for surface you don't use. A4 size (roughly 8.5x11") suits most hobby use. A3 (roughly 11x17") handles larger illustration work. Full-size professional panels exist for animation and fabric work.

LED light boxes typically specify a lifespan of 50,000 hours—decades of normal use. They run cool enough to touch, unlike fluorescent models that could get hot enough to warp during extended sessions. Look for flicker-free LED panels to avoid the subtle strobe that can cause eye strain with sensitive individuals.

Magnification: When Your Eyes Need Help

Magnifiers come in two basic forms: handheld and mounted. Handheld magnifiers work for quick inspection but aren't practical for working—you need both hands for your actual task. Mounted magnifiers (desk lamps with built-in magnification, floor-standing units, headset magnifiers) free your hands while providing consistent magnification.

Higher magnification isn't always better. At 2x, you have good detail with reasonable working distance. At 5x, you're much closer to the work surface—practical for tiny detail but awkward for anything larger. Most people doing general craft work find 2x-3x sufficient. Miniature painting and other ultra-fine work may benefit from 5x or higher.

Illuminated magnifiers combine task lighting with magnification. The light source matters here too—look for daylight-equivalent LEDs with good CRI. Cheap illuminated magnifiers often have poor-quality LEDs that add color distortion exactly where you're trying to see accurately.

Spray Booths: Do You Actually Need One?

Spray booths are ventilated enclosures for airbrush work, spray painting, and aerosol use. They capture overspray through filters and exhaust fumes, protecting both your workspace and your lungs.

Do you need one? If you're airbrushing regularly, yes—overspray accumulates on everything within drift distance, and the fumes from some airbrush mediums aren't healthy to breathe. If you're using spray fixatives or adhesives occasionally, you might get by with outdoor work or a well-ventilated area near an open window.

A proper spray booth has multiple filtration stages (pre-filter for particles, activated carbon for fumes) and an exhaust fan that creates airflow away from you, through the filters, and out of the space. Desktop models work for small-scale work; larger booths exist for model painting and professional illustration.

The alternative—a box with a fan—might capture visible overspray but won't properly filter fumes or create the directed airflow that pulls contaminants away from your breathing zone. If you're doing this work seriously, invest in purpose-built equipment.

A Note on Palette Knives

Palette knives appear in the "Tools" category but they're really painting implements—designed for mixing and applying paint rather than cutting anything. Flexible steel blades spread and blend color; offset handles keep your fingers out of wet paint.

If you're mixing oil or acrylic paint, a palette knife is essential. If you're doing impasto work (thick paint application), palette knives become primary painting tools rather than just mixing aids. They're covered more thoroughly in our painting guides, but they live here in the store's tool section for organizational reasons.

Punches and Fasteners

Punches create holes—for binding, eyelets, decorative purposes, or simply to hang something on a hook. Staplers and fasteners join materials together. These are straightforward tools where quality mainly shows in durability and consistency: a good punch makes the same clean hole every time, a cheap one may tear edges or jam.

For most craft use, standard paper punches and desktop staplers work fine. For heavy-duty applications—binding thick documents, punching leather, grommeting fabric—specialty tools designed for those materials are worth the investment over trying to force general-purpose tools to do jobs they weren't built for.

Frequently Asked Questions

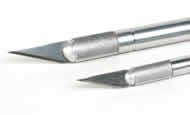
What's the difference between a $5 and a $15 craft knife?

Primarily build quality in the blade-holding mechanism. Cheap knives often have loose collars that let blades wobble, affecting cutting precision. The blade itself may be identical—quality blades are the real consumable. But if precision matters, a well-machined handle is worth the few extra dollars.

How do I know when my self-healing mat needs replacing?

When cuts don't close anymore, even after cleaning and hydrating the mat. When the blade catches and skips in old cut lines. When grid markings are worn off in the areas you use. When your fabric catches on the surface while cutting. A healthy mat feels smooth under a fresh blade.

Do I need a light box, or can I just use my phone or tablet?

For occasional tracing, a bright phone or tablet screen works. For regular tracing work, dedicated light boxes offer advantages: larger working area, adjustable brightness, no concerns about pressure on an expensive screen, and no notifications interrupting your focus. If you trace weekly or more, a light box pays for itself in convenience.

What color temperature should my task lighting be?

5000K-6500K for color-accurate work. 5000K is slightly warmer and may feel more comfortable for long sessions; 6500K matches daylight more closely and is better if you're working alongside natural light from windows. Either is vastly better than standard warm-white bulbs (2700K-3000K) that add yellow casts to everything.

Why do my cuts tear instead of slicing cleanly?

Almost always a dull blade. Fresh blades slice through materials with minimal pressure. Once a blade dulls, you press harder, and the excess pressure tears instead of cutting. Other causes: wrong blade for the material, cutting at too steep an angle, or material that's inherently difficult (thick leather, rubber, some plastics require utility knives rather than craft knives).

How often should I change craft knife blades?

Before they get dull enough to affect your work. Professionals often change daily or per project. Hobbyists might go weeks on light use. The real answer: when cuts stop being effortlessly clean, the blade is done. A fresh blade costs pennies compared to ruined work or an injury from a blade that slipped.

Is there really a difference between brand-name and generic replacement blades?

Yes, though it's most noticeable in edge retention. X-Acto and Olfa blades typically stay sharp longer than discount alternatives. For occasional use, this barely matters. For daily professional use, quality blades mean fewer changes and more consistent results.

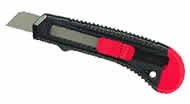
Rotary or guillotine trimmer for home use?

Rotary for most people. They're safer (blade enclosed), more precise for single-sheet work, and handle the trimming most home users actually do—photos, craft paper, card making. Guillotine trimmers make sense if you regularly cut thick stacks or heavy materials, but that's less common in home settings.

Do I need a spray booth for using spray fixative occasionally?

Not necessarily. Occasional fixative use can be done outdoors or near an open window with good cross-ventilation. But if "occasionally" turns into "regularly," or if you're working with more concerning materials like solvent-based sprays or airbrush mediums, a proper spray booth protects both your space and your health.

What magnification should I get for craft work?

2x-3x for most purposes. This gives useful detail enhancement while maintaining workable distance from your project. Higher magnification (4x-5x) brings you very close to the work—useful for ultra-fine detail like miniature painting but awkward for general craft use.

Starter Kit: X-Acto #1 knife with #11 blades ($8-12) + self-healing cutting mat 12x18" ($15-25) + metal ruler with cork backing ($8-12) = everything you need for basic precision cutting under $50. Add a 5000K task lamp with CRI 90+ ($40-80) if your workspace lighting is poor.

⚠️ Important:

Safety Fundamentals: Always cut away from your body. Use a cutting mat—never cut on bare tables, glass, or other hard surfaces. Replace blades before they get dull (dull blades slip and require dangerous pressure). Store knives with blades retracted or capped. Never try to catch a falling knife. Dispose of used blades in a rigid container, not loose in trash.

Precision Knives

Precision Knives
The #11 blade handles most cutting tasks—paper, cardstock, thin plastic, balsa. X-Acto, Olfa, and NT Cutter all make quality options. The blade matters more than the handle.

Replacement Blades

Replacement Blades
#11 for general work, #16 for scoring, #10 for carving curves. Change blades before they're dull—a fresh blade is safer and produces cleaner cuts.

Light Boxes

Light Boxes
LED models run cool, last 50,000+ hours, and offer adjustable brightness. Look for 3000-5000 lux for tracing through standard paper; 5000+ lux for heavier stock.

Paper Trimmers

Paper Trimmers
Rotary for precision single-sheet work, guillotine for cutting stacks. Most home users are better served by rotary—safer and more precise for typical tasks.